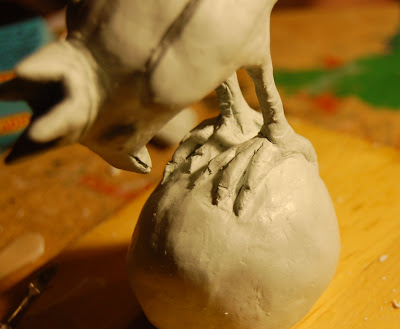
I have never worked with air drying clay before (I am more of a polymer cook-it-in-the-oven fan) but when I saw the little ornaments Michelle My Belle made last year, I was inspired to try it out. ( I also bought one of hers so I could see the texture and feel how hard the clay actually was. Well, I also bought one because they were so damn cute.)
First, you need an idea, so I made a whole bunch of sketches and decided to start by making a small Raven King sculpture.

Second, you need a few basic clay carving tools, aluminum foil, wire and wire tools, and some rocks. I also had this handy little sushi serving board my friend Ann just gave me and it works great as a base!

Why on earth do you need a rock? Well, I was making a freestanding sculpture, so I wanted the base to be heavy so he wouldn't fall over. I wrapped 2 of the rocks in foil and made a basic body shape out of foil and wrapped it all in wire to hold it all together. In hind sight, I would have wrapped foil around the legs too. The more foil infrastructure you have, the less clay you have to use. This clay is pretty expensive, $10 a pack. And I used half a pack. $5 doesn't sound like much, but you can't reuse this stuff so make sure you know what you are getting into!

Once my base was done, I started adding clay. Keep the rest of your clay wrapped up because it dries out fast! Even though it takes a couple days to dry out completely, I found that after using the clay only 1 1/2 hours it was getting pretty hard to manipulate.

Sometimes I forget how much I just love to sculpt things.

The crown was a little tricky to mold since the clay was starting to get stiff. But I used a little water to help smooth it out.

It took me about 1 3/4 hours to complete him. I am pretty sure I would have finished him much sooner, but I threw The Fellowship of the Ring into the DVD player and kept getting distracted. (Yes, I know in my heart of hearts I am a geek.)

I am anxious for him to dry so I can paint him. I will show completed photos as soon as I get him done!


That looks like so much fun. I always think of clay as functional -- I should try playing with it more.
ReplyDeleteI am surprised to hear you say that, Ann. Your whole house is full of pretty, lovely things!
ReplyDeleteYou're very good at pictures of your process. I really appreciate that being a picture learner myself.
ReplyDeleteAlso, nothing like slo mo Aragon to distract a girl. There ain't nothing geeky 'bout that. *happy sigh*