This is not so much a tutorial but more just showing you the progress my tweets go through as I make them. Frequently, I try to explain to people what needle felting is and they just don't get it. Hope this helps a little!
Yesterday's posting showed you how to make these wire bird legs.
I like to make the base of my critters with polyester fiber fill. Some felting purists like to use felt the whole way through. On smaller pieces I do, but when you start working larger the price of wool adds up. This fiber fill needle felts just fine and is just a fraction of the price of wool.
I start by roughly shaping the body in a cylinder and needle felting it just enough to get it to stay together before I wrap it around the frame and start needle felting it in place. When doing larger areas, I like to hold 2 needles in my hand to make it go faster. I have tried to use the tools that hold multiple needles and I don't like it as much. Then I poke and poke and poke gently using just the end 3/4" or so of the needles all over, hundreds upon hundreds of times to make it all stay together.
Here it is looking like a little snowball with legs. Not even close yet.
After I have been felting it a while I stop to do a squeeze test.
As you can see, it is still pretty squishy. I like to felt it until it starts to get firm.
Here I am pretty happy with the body shape. To make the tail end pointy, I squished it together while felting until it gradually held that shape.
Then I added a head. This fiber fill part took about a half an hour.
Next I had to pick my colors out. I love looking at and playing with wool roving.
Finally I settled on 2 blues for the body and then black and lime green for the detailing.
Sorry I didn't get any photos of the colored part of the felting. I was watching a movie while doing it and totally forgot!
From start to finish, from making wire legs to finished bird, took about 2 hours. But I was watching a movie and I stop felting when I look up (those needles are unbelievably sharp!) so I probably could have made it a bit faster.
I love felting!
Saturday, February 26, 2011
Friday, February 25, 2011
Wire Bird Legs Tutorial
I've gotten a few requests on how I make my wire legs for my needle felted birds so I thought it was time to give you a peek. They require just a few simple tools and the variations are endless. I have seen a lot of different ways that other artists make their own bird feet--there is no correct way so make sure you play with it a bit. It may take you a few tries until you come up with a style you like. Some people make the toes lay flat for better stability but I like them to look more sculptural.
Tools needed (from left to right) : Round Needle Nose Pliers, Flat Nose Pliers, Wire Cutter
note: my needle nose pliers are special "rosary" pliers and have a cutting tool on them but I never use it for wire this thick; I use the heavy duty cutters instead.
Wire needed: I use 18 gauge galvanized steel that I buy at the hardware store for about $4. One pack will make you an awful lot of bird legs! And make sure you get steel. One time I was in a hurry and bought aluminum by mistake and that wire is so soft, it breaks by just looking at it!
To start, cut 2 pieces about 14" long and bend at the half way point into an "L". The vertical part will become the leg and the horizontal will become the foot.
We are going to start by making the big, center toe (talon?) first. Then the back toe and then the side toes and then finish it up with a twist around the leg.
Make your big toe by wrapping wire around needle nose pliers. You only want it to be about an inch long maximum; a hair or two shorter is even better.
Next, make the back toe the same way but wrapping it UP around the the pliers. I like to make it a little shorter than the front one, but you can play around with it.
The key to good looking feet is bending the wire with the pliers to make crisp, sharp bends. So angle out that wire to make the first side toe.
Then bend it around the needle nose pliers to complete the toe. Getting the hang of this yet?
But here comes the tricky part. See below how when you bend the wire back and it ends up on the bottom of the foot? This doesn't work well because it is harder for the foot to lay flat. So you need to adjust the wire so that it goes through the foot.
Does that make sense? I'm sorry but I couldn't really get a comprehensible shot of bending the wire to fit it through the foot.
This is what is should look like. Go ahead and try it again if you mangle it the first time. It's okay. I will wait. (And you really don't have to adjust the wire, but I like the look better!)
Phew, okay, done with that part. Now it is time to angle the wire out to make the last toe.
This time you fold the wire UP and around the needle nose pliers so the wire ends up on top of the foot.
Finally, twist left over wire around leg to secure.
See? That wasn't so bad. But now you need 2 of them.
Once you have cursed me for not explaining things as easily as you would have liked, please move on to connecting the legs. Make a bend a little farther up than you want the top of the legs to be as you will be needle felting or sewing fabric or using clay (Whatever media you prefer) to wrap around the top wires to make your bird's body.
Loosely wrap the legs together to start so that you can ponder them and see if they are the shape and height you want them to be. You don't want any uneven legs here!
Finish wrapping the wire all the way down on both sides. I adjusted mine to be less spaced apart. Ta-da! Bird legs! I'll be showing how I make my needle felted birds tomorrow.
Don't forget to comment on my bird giveaway post for a chance to win this bird! Contest closes March 1, 2011.
Thursday, February 24, 2011
Snow Day Giveaway
Since it is a snow day and since I had no desire to venture outside today and because I love all of you who come and visit my blog, I decided to make a little felted bird for a goodie giveaway.
View from my dining room today:
I actually started making the bird as a tutorial on wire feet that I will be posting soon, but since the birdie is all done, I want to post the giveaway right away.
So here it is, all you need to do to win this little felted birdie is to comment on this post by answering the following question:
What is your favorite thing to do in the Spring?
That's it.
If you post this on your own blog, you get 3 chances to win. (Just make sure you tell me in the comments when you answer the question if you posted on your blog and throw in a link!)
Thanks! Winner will be selected randomly March 1st.
Thanks for playing!
P.S. I will ship this little birdie anywhere in the world! I know I have a lot of viewers out of the country, so go ahead and enter!
View from my dining room today:
I actually started making the bird as a tutorial on wire feet that I will be posting soon, but since the birdie is all done, I want to post the giveaway right away.
So here it is, all you need to do to win this little felted birdie is to comment on this post by answering the following question:
What is your favorite thing to do in the Spring?
That's it.
If you post this on your own blog, you get 3 chances to win. (Just make sure you tell me in the comments when you answer the question if you posted on your blog and throw in a link!)
Thanks! Winner will be selected randomly March 1st.
Thanks for playing!
P.S. I will ship this little birdie anywhere in the world! I know I have a lot of viewers out of the country, so go ahead and enter!
Wednesday, February 23, 2011
Jewelry Shopping in Dubai
I didn't buy as much jewelry as I planned while in Dubai, but I think the quality of what I bought is much better and more interesting than what I have bought in the past.
Above and below is a tassel I purchased at a booth in the Yemeni pavilion in the Global Village. Usually they are sold in pairs and are not earrings, but meant to hang off of a head dress. The fellow was so desperate to make some sales that he let me buy just one. We haggled for quite a bit. I think the detailing is just gorgeous.
I also picked up this necklace from him too. He said it was antique; I think vintage might be a better term for it. Nonetheless, I love it. It looks equally great with a simple black tank top or with something dressy.
And of course he wouldn't let me go until I bought this matching bracelet. It was easy to convince me.
And this old Yemeni coin is not jewelry yet, but it will be soon!
This stunning necklace was made in Turkey. I never caught the name of the shop where I bought this, but they import in the most fantastic, bold, and graphic jewelry from Turkey that is made to their specifications. I could have spent all my money in that shop. Talk about a statement necklace.
This delicate little elephant came from a store in the Dubai Mall called Monsoon. I also bought a beautiful gray tulle skirt and a couple of silk scarves from that shop.
The first day there I bought this ring at a little outside market.
Can you tell I like big and bold jewelry?
Tuesday, February 22, 2011
Tins and Tea
The last two times I was in Dubai, I spent a lot of my money on fabric. I still have a lot of that fabric sitting on my shelf, so this time I was more focused on jewelry supplies and tin.
It was my sister's idea for me to look for interesting tin; I didn't even think about it. And while they don't have thrift stores all over the place with everybody's used tin in it, I was able to scrounge up 11 containers, albeit over half of them new. There is a good story about that extra large tin in the center back. I went into a little shop in the Spice Souk, an old winding alley sort of place and haggled forever with the shop owner (Jamal) to sell me the tin. It was full of saffron and he was completely baffled why I would want some ratty old tin and not the saffron. But capitalism won the day and he took the saffron out and even cleaned the tin with a feather duster and let me purchase it for 20 dirhams ($5.55).
Most of the other tins are tea containers. Tea drinking is rampant in Dubai. With a huge Arab, Indian, and Pakistan population (not to mention the British ex-pats) good tea is easy to find. I bought these basic teas at the Arabic grocery store. I can't wait to make jewelry with the Arabic script on it.
The other sides of the tins have English. That red tin in the back is a semolina container.
My sister took us to a special tea shop where they give you tons of samples and sell lovely tins for putting the tea in.
In the Global Village, we scored these hand painted Moroccan tea glasses. Lovely. Tiny because Moroccan mint tea is strong on flavor and sugar. Great for after dinner or mid-afternoon.
I love the purple color.
When I went to the grocery store yesterday to replenish our empty fridge, I went searching for a teapot as well. We already are big tea drinkers, but usually we put the loose tea in individual metal tea infusers, but they are sort of a pain to clean and not good for more than 2 people so I thought it was time to get a teapot. Of course, Fred Meyers had pathetic choices and I am going to have to look for a better one, but I picked up this $12 cheapie; it looks like it might fall apart any second.
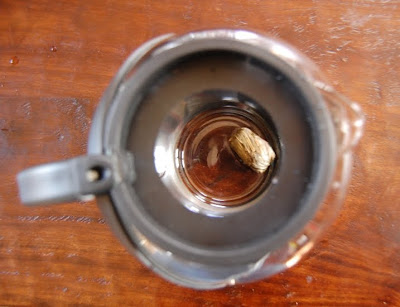
But the funny thing about it was that it was this gimicky teapot (As Seen On TV!) that came with these "flowering tea buds" that are supposed to become lovely flowers that unfurl in the water.
I decided to give it a try. They were green tea with jasmine and smelled delicious despite their gimickyness.
I was doubtful.
The instructions said wait 5 minutes to see the beauty of the flower, but after 5 minutes it just looked like some invasive pond weed.
I poked it with my finger and it opened up a little more.
The end result is nowhere as dramatic or as lovely as the picture. Of course, what was I expecting?
It tasted pretty good actually, but I am looking forward to trying our new teas instead.
Subscribe to:
Posts (Atom)